All files should be copied to Medical Center maintained server. Read these instructions or look for these shortcuts which are in multiple locations on the computer
Zeiss 800 upright microscope RB 2-601 Cell Biology
Michael Cammer & Yan Deng are the contact people for the microscope and to use it you need to be part of the group that purchased it.
Sign up in advance to use microscope:
https://nyulangonesignups.resourcescheduler.net/resourcescheduler/schedule.asp?Topic=RES&TopicId=83&
All files must be saved on Drive D:
All files should be copied to Medical Center maintained server. Read these instructions or look for these shortcuts which are in multiple locations on the computer
If you are asked to install an update, just say no!
About the microscope
| Laser lines | Useful for... |
| 405 nm | Dapi, CFP, Pacific Blue |
| 488 nm | FITC, Alexa488, GFP, YFP |
| 561 nm | RFP, mCherry, rhodamine, Cy3, Alexa568, Alexa594, propidium iodide |
| 640 nm | Cy5, Alexa647, To-Pro |
There are two ways to choose the spectral detection. One is by filter and the other is by a user adjustable mask. If you are using multiple channels, imaging will be much faster if the mask does not move between channels.
| Emission filters & splitter | Useful for... |
| Dapi, CFP, Pacific Blue | |
| FITC, Alexa488, GFP, YFP; (May collect spillover from blue) | |
| RFP, mCherry, rhodamine, Cy3, Alexa568, Alexa594, propidium iodide; (May collect spillover from green) | |
| Cy5, Alexa647, To-Pro; (May collect spillover from red) |
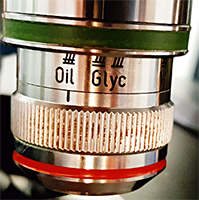
Use oil that says RI 1.518 on the bottle.
For best results, use #1.5 coverslips as explained here.
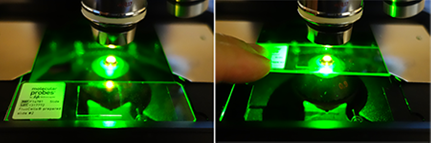
Startup:
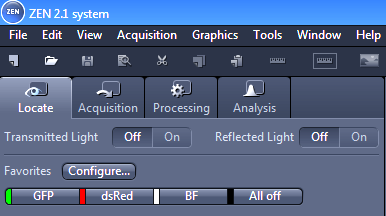
To look by eye, the slider on the right side of the microscope must be pushed in, all the way to the left.
To use the confocal, the slider must be pulled out all the way to the right.
 Put slide on the stage.
Put it in the recessed are of the stage closest to you and push it back under the metal tabs.
This means that samples should be at the center of the slide, not at the far edge.
Use joystick to move stage. F1 button in top right corner toggles from fine to coarse and back.
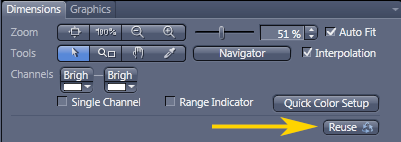
Find sample.
Then set up tracks in Acquisition tab.
The behavior of the Live scan button is different than previous versions of the Zeiss confocals. You cannot image multiple tracks simultaneously, details here.
This microscope has GaAsP detectors which can be burned out by excessive voltage. Saturating your images can damage the microscope as well as confound quantification. We are happy to explain this further; please let us know.
Always leave the Digital Offset at 0 and the Digital Gain at 1.
DO NOT use these to reduce background or brighten the image. Especially if you want to do intensity quantification later, using these will complicate or nullify the ability to do so.
Pinhole always at 1 or smaller. Greater than 1, go use widefield microscope with camera instead.
In the images below, note that you can click off the Show All box at the top of the Channels window so that the sliders for Digital Gain and Offset will disappear so you won't be tempted to touch them.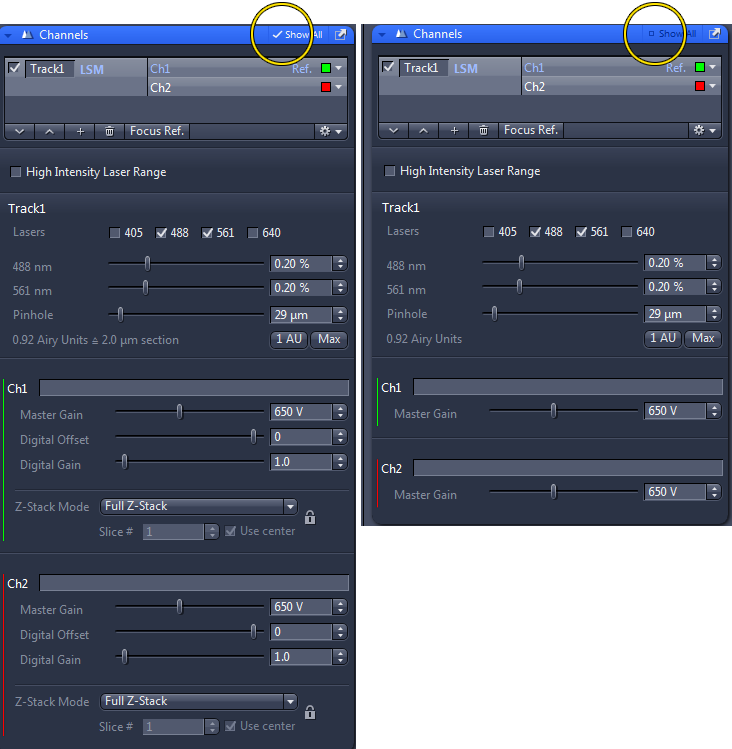
Digital Gain should always be 1.
Digital Offset should always be 0 or 1. Do not set below zero!!
Do not saturate images. You can see weak signal without blasting out strong signal. If you have this issue, please ask staff to help with settings.
Save all images on drive D: only. Files stored on drive C: may be deleted without warning.
All files should be copied to Medical Center maintained server. Read these instructions or look for these shortcuts which are in multiple locations on the computer
Click here for screen snap of how to export TIFs from the Processing tab, especially useful after stitching.
Always save files as CZI. These files can be opened directly into image analysis software. These files retain instrument settings, channel integrity, bit depth, and spatial scale that may be necessary for image analysis.
If you save files as TIFor other formats, the integrity of color channels may be lost and you will have no metadata regarding instrument settings and spatial scale.
Tiling or mosaic images need to be stiched in the Process tab with fuse tiles turned on. Tiling works best at a zoom of 1 or greater with 10% overlap.
Shutdown:
SN 2633000142
1-800-633-6610 1 1
comments, questions, suggestions for this web page: Michael.Cammer@med.nyu.edu or mcammer@gmail.com