Zeiss Light Sheet Z1 notes
Lightsheet microscopy is excellent for transparent live organisms such as embryos and zebrafish and for small cleared organs. It complements confocal microscopy by imaging optical sections of larger tissues.
The lightsheet microscope here works with living samples in water or media and with fixed and cleared samples such as CLARITY. In 2022 the instrument was upgraded from aqueous only to also use organic solvents. Refractive indexes 1.33 and up.
With lasers at 405, 488, 568, and 638 nm, this system images most genetically encoded fluorescent proteins and other popular fluorescent probes. Magnification is at 5X N.A. 0.16 or 20X N.A. 1.0. Images are collected with two 1920 X 1920 pixels sCMOS cameras. (Afte rthe upgrade, there may be other lens options.)
If you are considering light sheet microscopy, please watch this short video by Zeiss. It is a good introduction to the version of lightsheet available in the microscopy core here. (Posted 2022-03-03)
https://zeiss.wistia.com/medias/qcowe1ssul?mkt_tok=ODk2LVhNUy03OTQAAAGC8CBYYe9anH_C8eEbVy06BIPEZrpwBJsCRsW8U2U6GGiMNYsTkVqMx11_Lrk4Srl4z88i1FvVubTjRtUZS1XCblY9oxuSIZq_ZcbkGDmCQvqXZSjcxQ
After training, schedule the instument here.
2013 Zeiss PDF instruction manual
2014 Zeiss PDF instruction manual (other languages available in Zen/manuals folder on the microscope computer)
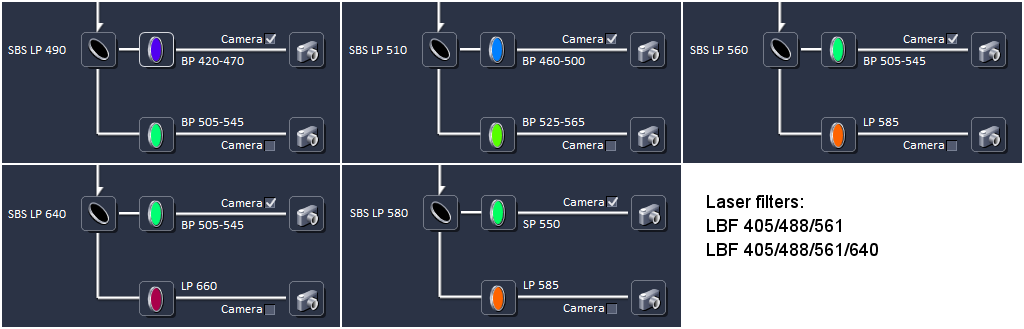
Lasers & Filters
405, 488, 561, and 638 nm
A problem with these filters is that in samples labeled with both a red probe (e.g. Alexa 555) and a far red probe (e.g. Alexa 647), when exciting at 561 nm, both colors are always visible. Therefore, we have proposed two harware solutions, but neither is implemented (yet).
Option 1:
In SBS LP 560 block, replace the LP 585 with a BP 570 to 640 to block the far-red
Option 2:
In LBF 405/488/561 block, add a SP 640 or similar to block all light longer than 640 nm.
One of the LP585 filteres was replaced with a BP 600/50, but not sure which one. We need to correct this on the web page. Jump to bottom of webpage for instructions how to do this.
Lenses
When switching lenses, need to go to Maintain tab to set both illumination and detection.
Illumination for 20X Water, 10X/0.2 400900-9000-710
20X Water lens W Plan-Apochromat N.A. 1.0 421452-9700
Always:
5X illumination optics for 5X objective lens
10X illumination optics for 20X objective lens
When installing chamber for live work, if want to monitor temperature, must plug in temperature probe BEFORE starting software. Restart Zen if necessary.
When screwing in optics, do not tightened. Simply turn until they stop. Do not tighten. Did I say do not tighten?
![]()
Sample Prep
A live zebrafish is embedded in agarose inside a small bore pipette. After the agarose hardens, it is pushed out into the sample chamber of the microscope (teflon tip of plunger at far left). Imaging cannot be performed through the glass.

CLARITY sample embedded in agarose: 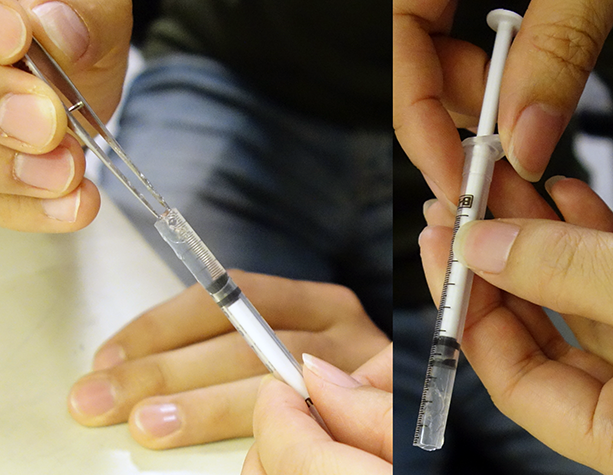 |
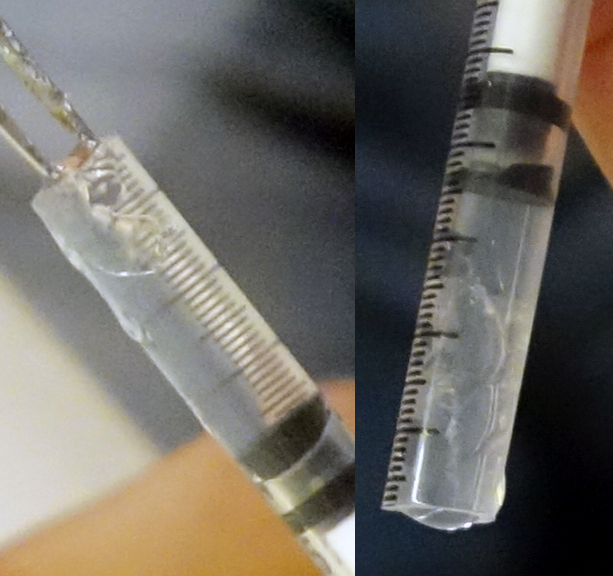 |
The syringe is a special type available in Europe. However, we have found at least one availablein the U.S. that works well too.
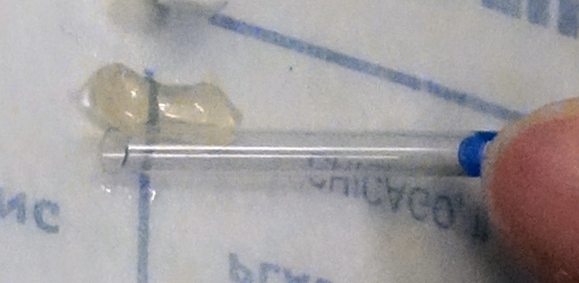
Alternative CLARITY sample method glued to side of capillary with Krazy Glue (only allows for 270 degrees of imaging):
We have imaged with slight refractive index mismatch in 80% glycerol/water and will post better media soon.
How to switch from 5X CLARITY to 20X CLARITY click here
Instructions for switching to organic solvents shoul dbe on this web page but aren't...
Things you need:
Image Processing
We need to write macros for IJ to open a series of images, process, and save out for display. First try here.
One example would be to cross subtract channels, or percentages of channels from the other cahnnel. Here is an example of how to do this in Zen. This takes each slice of a ZT series and subtracts the autofluoresence in channel1 from the signal detected in channel2. This highlights cells that are in channel2, but has the danger of removing channel2 real signal that is in the same XYZ position as autofluoresence. This has to be done on the raw data because projections don't preserve data specific to Z locations. |
 |
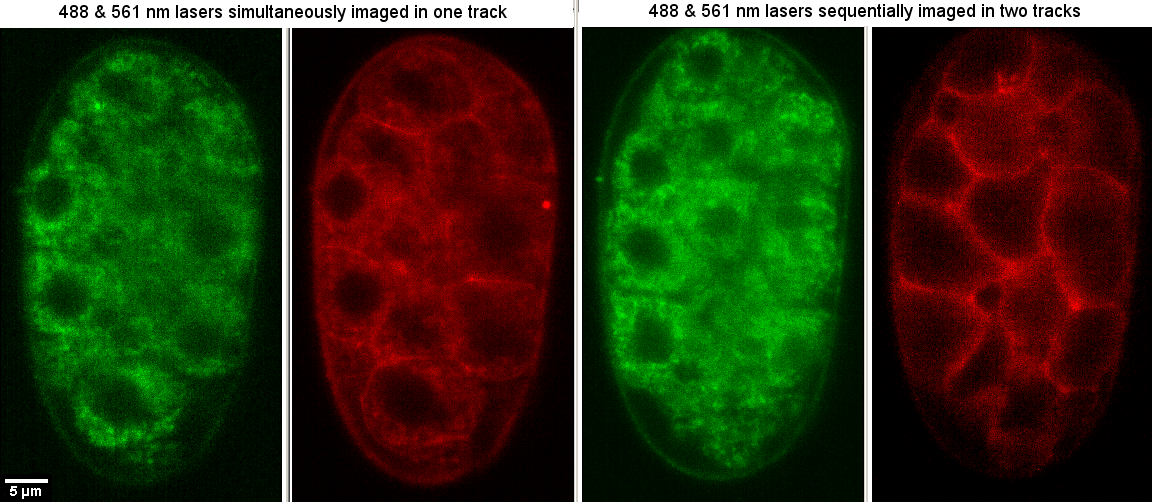
If there are spillover problems and you can image a little slower, you can set up tracks such that different laser and filter combinations are imaged in sequence. In the following example where on the left the green signal spills over into the red channel when both the 488 and 561 nm lasers are illuminating, the images on the right show a track with 488 nm alone and camera 1 followed by 561 nm alone and camera 2. In this case, no filters were changed so mode "Frame Fast", but filter changescan be effected too although relatively slow. Also, two tracks have the benefit that the two cameras may have different exposure times.
Note to self:
Need to add:
To Clean Chambers
Replace glass windows, glass against metal and O ring on outside.
comments, questions, suggestions: Michael.Cammer@med.nyu.edu
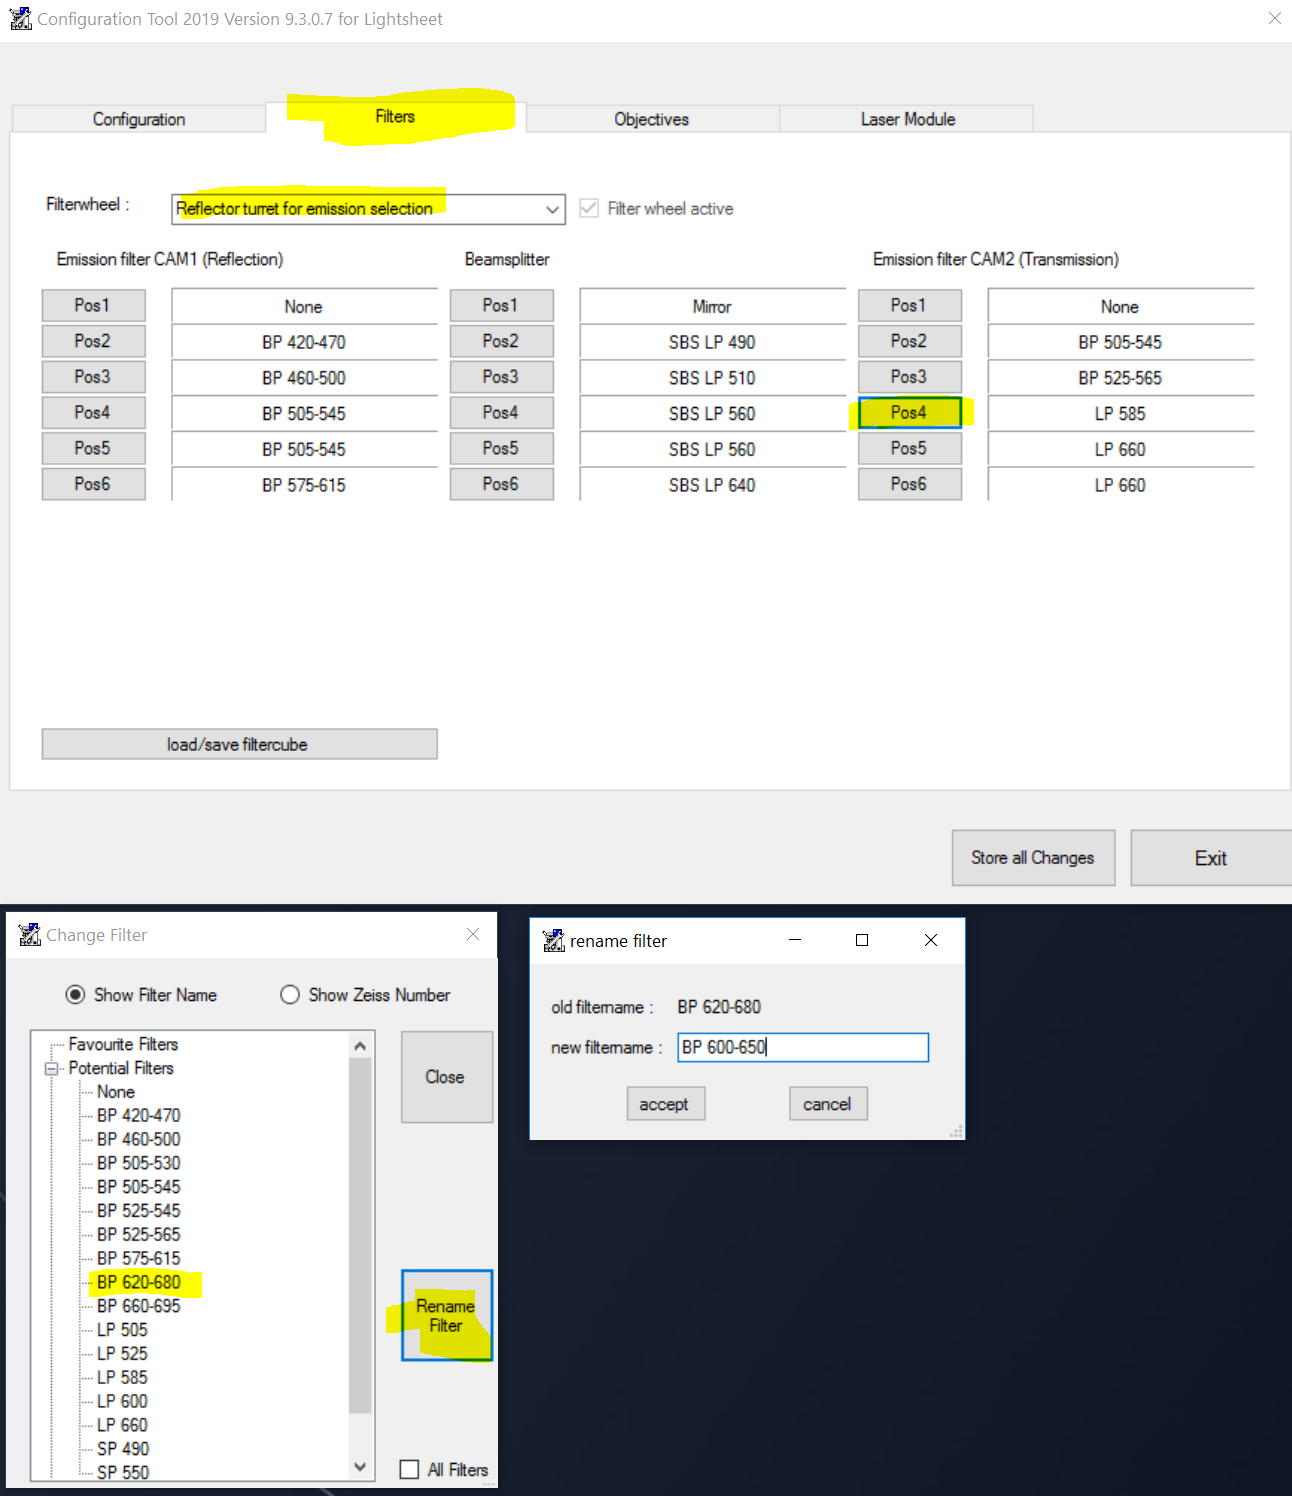
I only know how to rename an existing filter. I don't know how to add a new user-defined filter. @Erben, Ulrich do you know the procedure to add a filter?
To rename a filter, you'd need to go to the configurator tool and load the database. Then pick one of the filters that you aren't using and rename to BP 600-650:
Troubleshooting Zen Black not starting:
Go to the following folder (replacing LSM user for whatever the user name is).
C:\Users\LSM User\AppData\Roaming\Carl Zeiss\AimApplication
Select all folders and delete them (move them elsewhere if you are worried about losing them but should be fine to delete them).
Restart ZEN.