Zeiss Light Sheet Z1 notes
- Turn on power switches
- Top: Microscope box
- Middle: Computer
- Bottom: Incubation (only required when temperature needs to be stabilized).
If using, the chamber needs to be installed before Zen software is executed.
- When starting Zen software, make sure the correct database is loaded to match with the lens you are using.
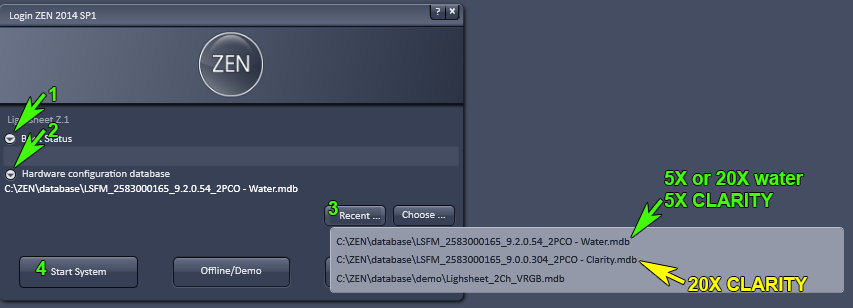
How to switch from 5X CLARITY or 20X Water to 20X CLARITY
- Retract sample in capillary (if mounted in tube) - watch in Locate mode on screen
- In software (XYZ window) raise stage to Load Position
- Carefully remove sample by pulling straight up. If sample glued to side of capillary, be extra careful.
- Remove fluid from chamber.
- Remove chamber
- clean lens
- change filter block
The filter wheel positions are:
4: Plate
5: Quad use this one
6: Tri (404900-9100)
- change objective lens including ring at base
- Removed illumination optics (side)
- Remove objective lens and the ring at the base
- Check RI ring on CLARITY lens set to correct RI
- install lens
- install illumination optics (10X with bevelled tops)
- check all windows in chamber are clean
- make sure all holes are capped, especially the hole on the lower right side
- push in and lock
- Restart software with CLARITY database - This is the little "Boot Status" triangle in the lower left of the Zen startup splash screen (see above)
- Maintain tab to choose correct lenses for both illumination & detection
<--Back
comments, questions, suggestions: Michael.Cammer@med.nyu.edu