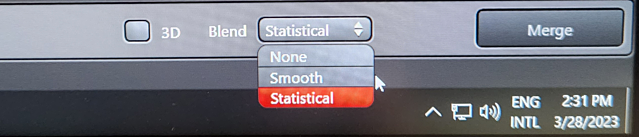
Statistical
We do not have step-by-step instructions for tiling, but we are beginning with a few basic guidelines.
Until we have a protocol, please review Leica's training materials which can be found on dropbox at https://www.dropbox.com/sh/9q8prqeuf08moam/AABt0cq5S0KOSNeA8YMQXeT7a?dl=0 in userhelp.zip which you can download and install on your computer. Do a search for "navigator" and look at the labeled example here:
training%20materials/UserHelpEnglish/Content/EXP/EXP_stage_overview_GUI.htm
Important considerations for tiling.
Plan apo lenses are better corrected across the entire field of view.
Do not reduce zoom below 1. Use 1x or higher. Less than 1, such as 0.75x, is likely to result in vignetting, which means dark edges &/or curved corners. Yes, you can collect fewer fields, but there is a price to pay for this.
When images are noisy, meaning a lot of single pixel salt and pepper, where the edges of adjacent field are blended, the noise gets averaged to approximately half the original intensity value and, therefore, there appear to be smooth grid lines. Most of this can be removed with a 1 pixel radius median filter, such as Process > Filter > Median > 1 in ImageJ. A better way to avoid this is turn the gain lower in the original imaging to not collect noise in the first place. Or image slower or with averaging.
Also, switching this one channel to photon counting mode and accumulating (only in this one channel) may improve image quality substantially. (Discuss with me if want help seting up the tracks for this.)
Basic Protocol
Setting up a Z series around any one of these defined focus points will propagate to all other focus points.
Assuming that the sample is at a uniform tilt, the Shift focus map to current Z button may be used for any roi on the slide.
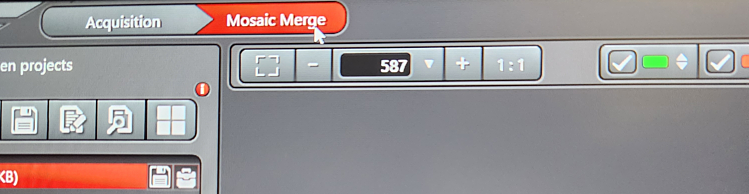
Mosaic Merge
Statistical
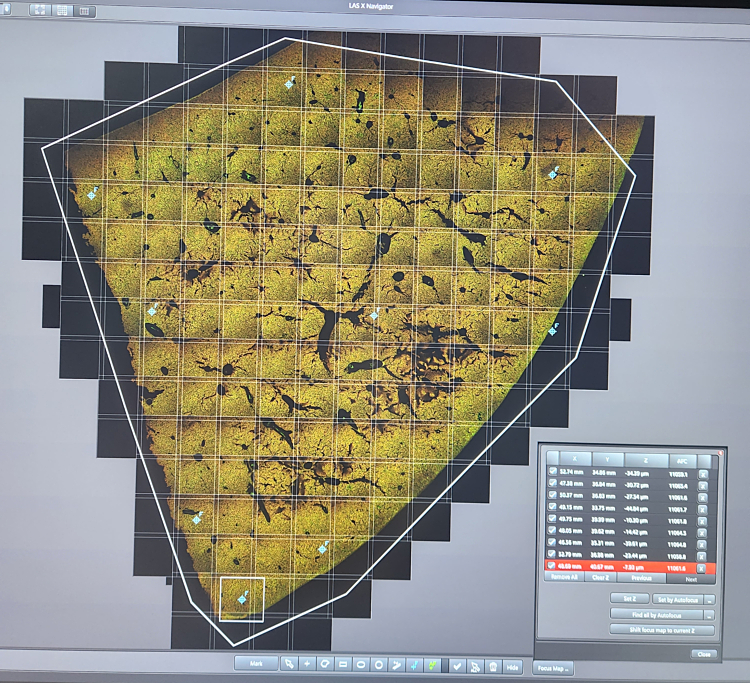
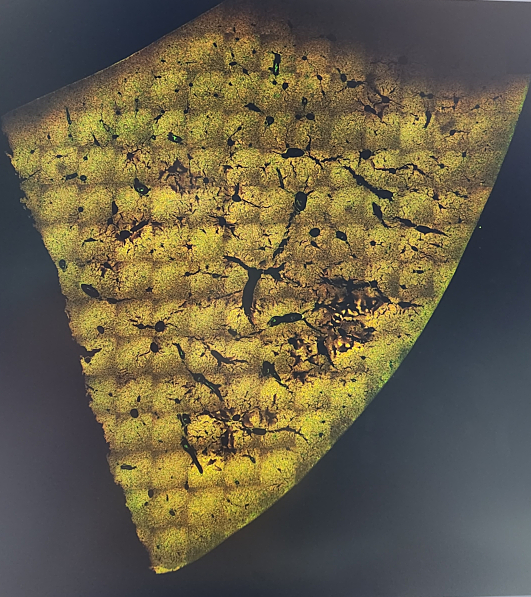
To create the tiled images below, a H&E section of liver was intentionally put on the microscope stage at a tilt.
The tiled image at the left had a few focus points set, but not enough to correct the edges of the tissue.
At the right, additional focus weighpoints were added.
Below is the image showing the focus points and the window for setting them. The upper right could use an additional point ot two to bring it into focus.
 |
 |