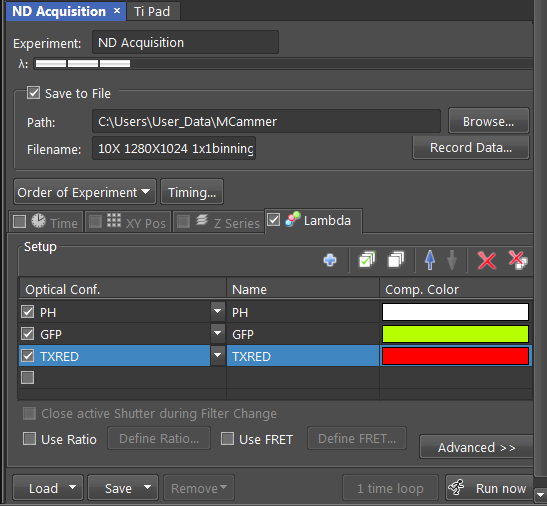
Make sure "Save to file" is checked and the paths and file name is correct.
Uncheck the "Time" tab if only taking single pictures.
"Run now" button in lower right corner of window to take pictures.
TIF and JPG throw away information!!!
Nikon inverted microscope Room MSB 595B
To sign up for microscope in advance
http://signups.med.nyu.edu/facilities/equipment/signups/nikon-fluorescence-microscope
Microscopes uses Nikon Elements software. [User's Guide v. 4.0 PDF]
This microscope is good for routine snapshots of Blue, Green, Red, Far-Red fluorescence.
Warnings:
1.) The Channels are not in perfect XY registration due to old filter blocks.
2.) Chromatic aberration, especially at low magnifications, may require refocusing between channels, especially blue.
Do not use for brightfield histology in color.
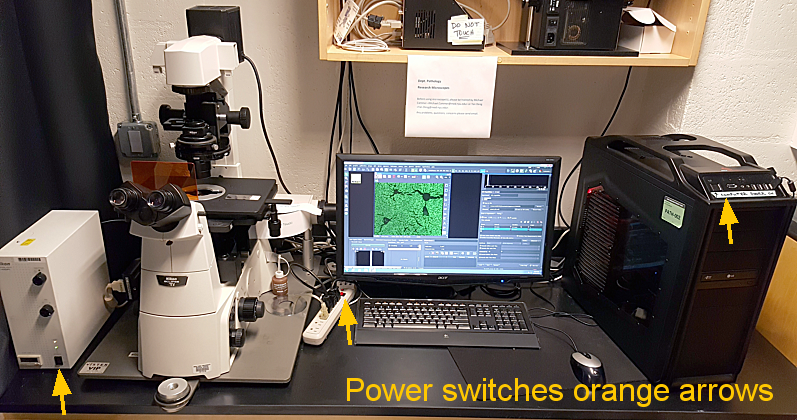
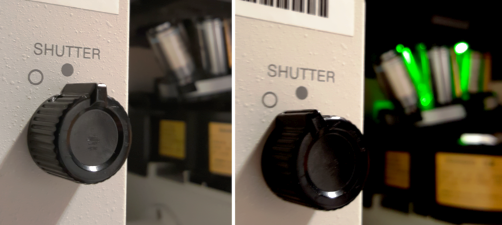
Instructions for turning on:
Shutdown:

Nikon DS-Qi1 camera installed on 1 April 2015. Recommend using at full 1280 x 1024 with binning 1 X 1. New spatial scale information here. Other changes: When you turn on the computer, it will log into a common account. When you run NIS Elements, the first thing you should do (if you have used the system before) is load your favorite settings. There are two parts to this. You may customize the look of the program screen. In the lower left there are tabs.
Saving/load your own settings. Recommend not using 100X except for 1 ms exposures due to shaking. Save Files Efficiently
DO NOT STORE FILES ON THE DESKTOP. Files on the Desktop may be deleted without warning. DO NOT SURF THE WEB FROM THE COMPUTER. |
Aligning Light for Brightfield
If imaging by brightfield, phase contrast, or DIC/Nomarski, always set condenser for Kohler illumination.
1. Focus on sample
2. set condenser for BF
3. Close Field Diaphagm
4. Move condenser up and down using knob on right until center octagon is in focus
5. Center by turning two knobs on condenser.
6. Open field diaphragm to edge of visible field, not all the way.
Standard lenses on this microscope:
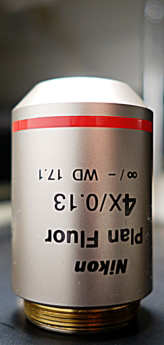
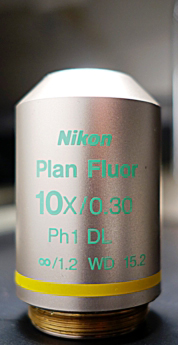
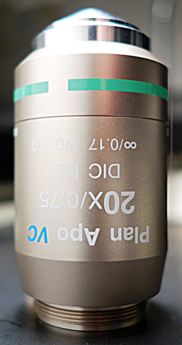
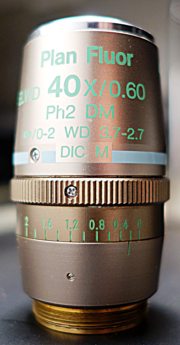
For best images use #1.5 coverslips. The lenses are designed specifically for #1.5 coverslips. Except for the 40x/0.60 lens which needs to be adjusted for each sample, see below.
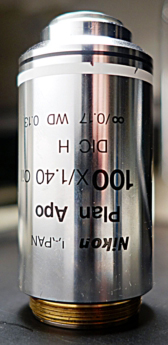
We recommend you do not use the 100X lens.
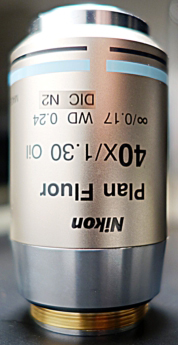
There are two 40X lenses. Which 40X lens should you use?
The 40X lens with the numbers printed in green is designed for tissue culture plastic. It will work with coverslips, but has a ring on it that needs to be adjusted. It is an air objective. DO NOT put oil on it!
The 40X N.A. 1.3 lens with oil is designed for higher resolution.
Click here to see a comparison of these two lenses.
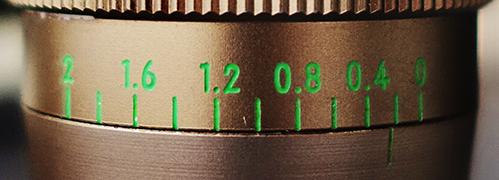
To get the best resolution, you need to adjust the collar.
As pictured, the adjustment is a little bit too far open for a #1.5 coverslip, but close enough. If you were imaging through a plastic tissue culture dish, the setting would likely be between 1 and 2. (The units are mm.)
You cannot easily see the collar underneath the stage. Therefore:
1. Focus on sample best possible.
2. Reach under stage to turn ring on objective a little.
3. Refocus, turn ring, and repeat until image has maximum crispness.
Also, this may also be done when in the fluorescence mode. It is important to make this adjustment or else your pictures will not be in proper focus.
comments, questions, suggestions for this web page: Michael.Cammer@med.nyu.edu or mcammer@gmail.com