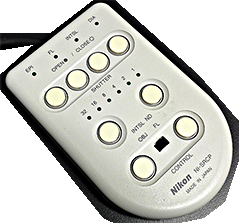
The touchpad is broken.
Click here for instructions to control the microscope from the software.
Notes for Nikon Upright Microscope in Histopathology Core, 5th floor MSB
Sign up in advance using LIMS. From off campus you need to connect through OnSite Health first
This microscope has brightfield, Dapi, GFP, and RFP flourescence.
| |
The touchpad is broken. Click here for instructions to control the microscope from the software.
|
How to Turn On (follow step-by-step):
Setting intensities
The camera is called a DS-Ri1. Therefore, click on the DS-Ri1 tab to adjust the exposure time and gain. Keep the gain low to avoid noisy (speckled) images).
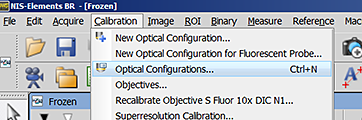
To set each color, click on each channel button ![]() , hit the live button
, hit the live button ![]() , and adjust the camera exposure time.
, and adjust the camera exposure time.
File formats
People typically save their images as tif. This may seem convenient, but if you start having to separate channels manually and recombine using Photoshop, this gets tedious. Also, metadata, such as exposure times and magnification, are lost.
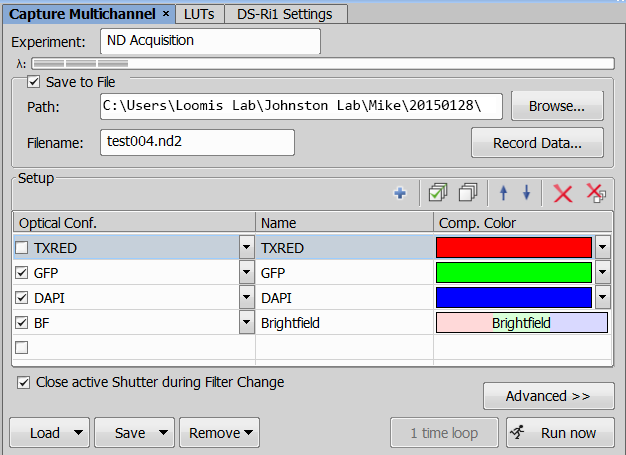
The better option is to use the Run Now ![]() button to save files as native nd2 and use ImageJ to automate figure production including adding scalebars. Macros can be written to process entire folders of images. And if you have correctly set the objective magnification
button to save files as native nd2 and use ImageJ to automate figure production including adding scalebars. Macros can be written to process entire folders of images. And if you have correctly set the objective magnification ![]() , these data are stored with the file.
, these data are stored with the file.
When nd2 files are opened in ImageJ or Fiji, they are multichannel color.
The best way to collect images it to set the illumination intensity and camera exposure time for each channel. Set the filename. Click on the channels in the Capture Multichannel window. Click Run Now. The images will be collected and the file saved. Each time you click Run Now, the file number will be incremented.
Brightfield
If imaging brightfield, it is important to have the microscope aligned for Kohler illumination. This microsope is usually kept aligned and tape covers the knobs required to do these adjustments. This is because 1.) the microscope is stable enough to hold these settings, 2.) people ignore instructions to align this even with good training and persistent reminders, and 3.) people turn knobs indiscrimately which messes up the system for subsequent users.
However, these is an aperture that may be adjusted to increase or decrease contrast to see tissue morphology. It should be in the position at the left for most applications. But people who want to generate more contast may turn it as pictures at the right.

add pictures here showing the difference...
Load Your Own or Default Settings
When you first start up the software, you may want to load either the default settings or your own setiings.
To load default settings:
when you first run the software, on the far left toolbar near the bottom there sould be a green arrow.
![]()
Clicking on this arrow should load the default settings.
These buttons should first disappear and then be refreshed with the default values.
![]()
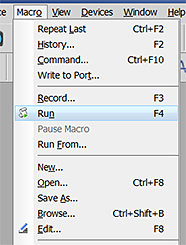
If the green arrow is missing, you may load the default settings from a menu.
One way to do this is from the Macro menu to first Open the Restore Default Settings macro and then to Run it.
A second way to do this is to Import saved settings.
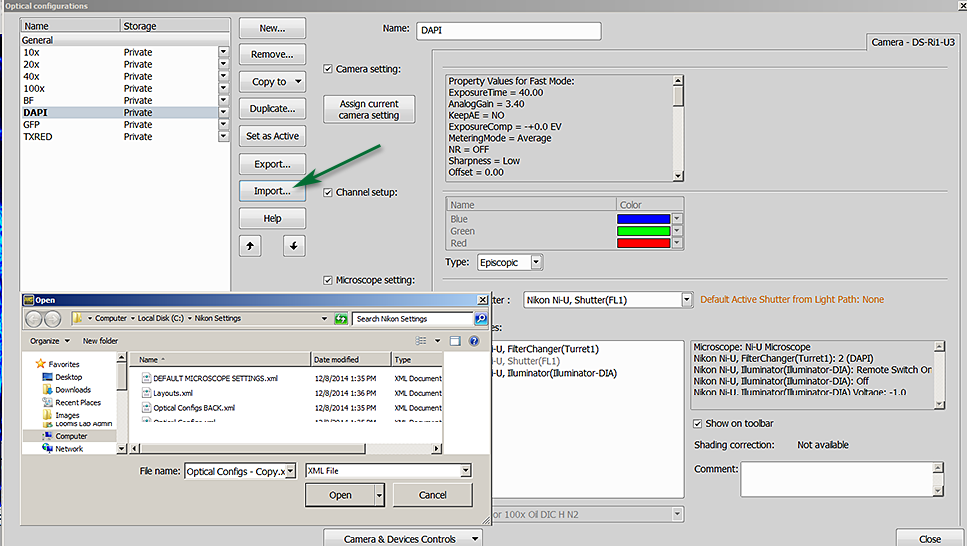
The default settings are saved in C:\Nikon Settings\
Users may save their own favorite settings in their own directory using the Export button in the window pictured above with the boxes checked as pictured and reload at the beginning of their next imaging session.
comments or questions? contact michael.cammer at med.nyu.edu
comments, questions, suggestions for this web page: Michael.Cammer@med.nyu.edu or mcammer@gmail.com