Nikon TIRF * Protocol for FRAP
This is much easier to do than the length of this protocol suggests. The pictures and textiness are a checklist for setting up the instrument. But in real life, you set up the instrument once at the beginning of each session (5 to 10 minutes) and save the settings. Then each bilayer is a simple
find it,
load the settings,
click run,
push in and pull out a slider on the left side of the microscope,
wait 2 to 3 minutes,
look at the result, and
either do the biological experiment or move to another bilayer for testing.
Step-by-step setup
Put the bilayer on the microscope and set up imaging with the AOTF as low as you can set it and get it to image with a dynamic range of at least 500 intensity values. For instance, AOTF 1, camera sensitivity EM 5MHz, Gain 200, Conversion gain 2.4x.
To see the bilayer, you may need to adjust the LUT dramatically, for instance from 100 to 1700.
Remember to right click on the the button at the top of the screen to save the microscope and camera settings!
In the "ND Acquisition" tab set the Lambda to only image the one channel.
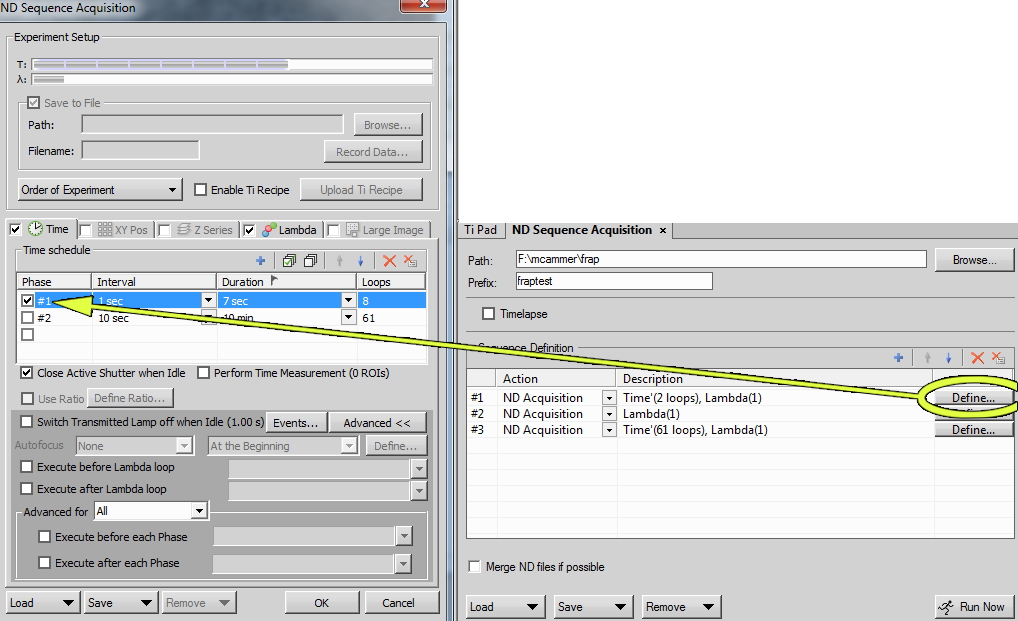
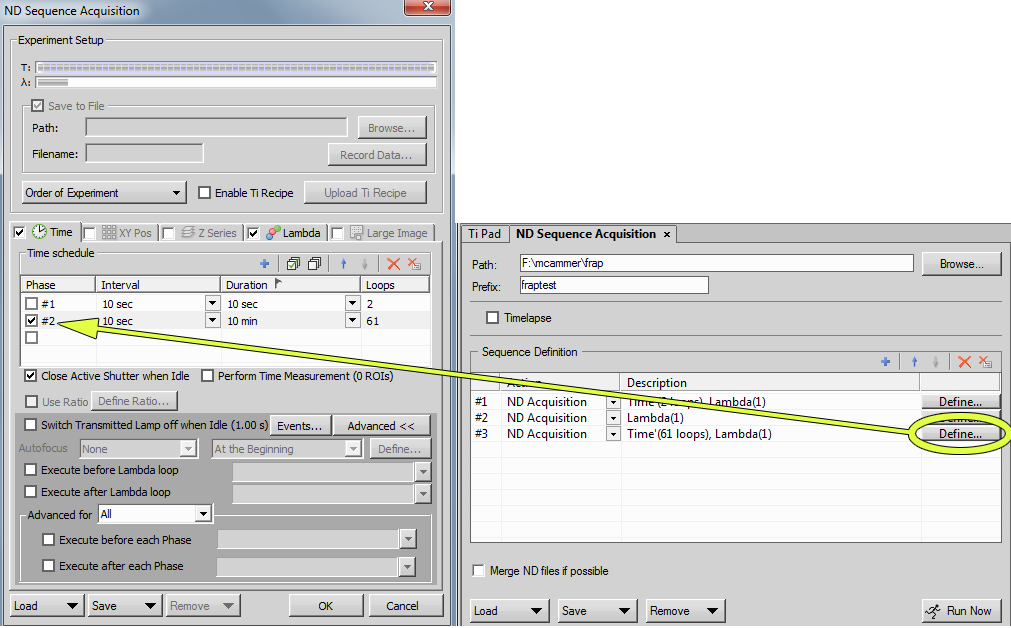
In the "ND Acquisition" tab set the Time for two time lapses, one for collecting images before the bleaching and one for after the bleaching.
Add these time lapses to the "ND Sequence Acquisition" tab. The "ND Sequence Acquisition" interface allows different imaging conditions to be run in sequence. We are running three conditions: 1.) before images, 2.) bleaching, and 3.) after images.
You may click on the "Define" button in the "ND Sequence Acquisition" tab to fine tune the intervals etc.
Checking the "Merge ND files if possible" is supposed to put the entire sequence (before, bleach, and sequence postbleach) into one file in the correct order, but the one time we tried this, the files were scrambled. You may try this or wait for us to characterize it. For now, we have been saving three separate files per experiment and concatenating them in ImageJ.
![]()
Set the Path and Filename in the "ND Sequence Acquisition" window to your directory.
There may be a more elegant way to do the bleach, but for now we are collecting one dummy image to make this work.
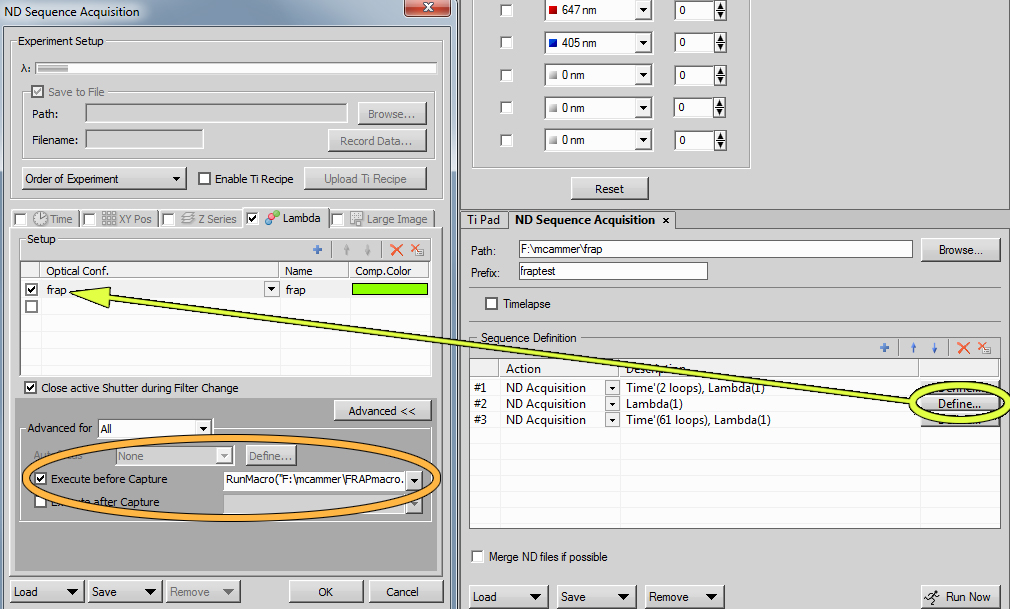
Choose the "frap" method and set it up to have the same TIRF angle and filters in use as the imaging method.![]()
Set the laser for bleaching to 100% and all others to 0. [NOTE TO MC & DD-- we need to change the laser setting to a macro because the enite image is flashed for the exposure time in this method with 100% laser. This should be the real instruction: Make sure all lasers are unclicked or set to 0 in the the AOTF window.]
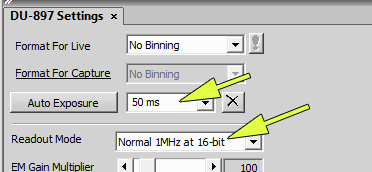
Set the camera as follows (or something similar):
In the "ND Acquisition" tab set the Lambda to this and turn off "Time".
Add to "ND Sequence Acquisition" interface. Click on the little red arrow to put between the imaging time sequences.
Define the macro that will do the bleach. (Once you have settled on a favorite bleach time, we may save the macro in your folder so you do not need to change this.)
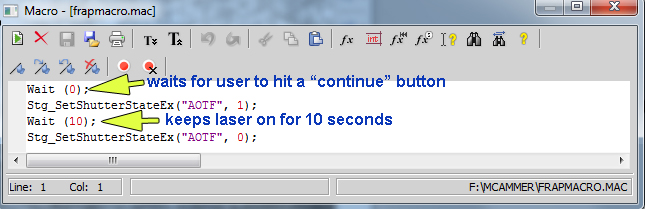
Time to do FRAP.
Click "Run Now" in lower right of "ND Sequence Acquisition" window.
Immediately after the before images are collected, a window will pop up with a "Continue" button.
Push the field diaphram closed. This is on the left side of the microscope body under the stage.
When you reach back to open and close the field diaphram, be careful to not bump the camera and other equipment with your hand or arm.
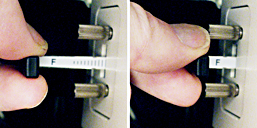
To image, this slider is normally in the out position (left).
Push in (right) to close the field diaphgram to make a spot.
Pull out (left) to image the whole field.
Click "Continue".
Watch the laser illuminating the sample. Immediately when it turns off, pull out the slider.
Sit back and wait two minutes or so.
Look at your data.
content last updated 20110318 - links last updated 20190326
comments, questions, suggestions: Michael.Cammer@med.nyu.edu