
Prairie multiphoton microscope
Table of Contents
Open shutter to stabilize Pockels cells. See below.
Lasers are located behind the table. Key needs to be turned. Warm up time less than that required for Pockels cells (below), so will be ready by time of imaging. Wavelength may be adjusted using big knob on controller near floor or later in PrarieView software.
According to Prarie, the Pockels cells, one which attenuates each laser, need to warm up for approximately 20 minutes to be stable.
To do this, the hard shutter needs to be opened.
Click on the 2-P tab in the center left of the screen.
This gives you access to the shutter built in to each laser.

Then go back to the Laser tab on the far left. Use the Hard Shutter to open the shutter between the Pockels cell(s) and the objective lens and also use Live Scan.
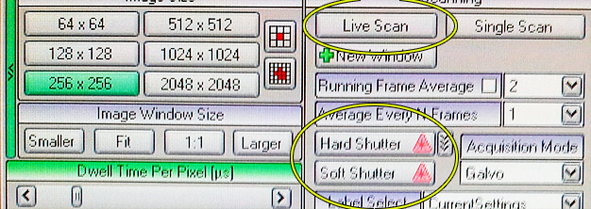
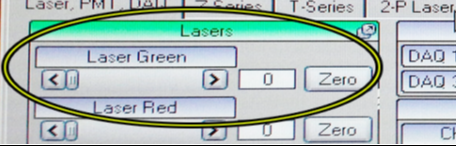
Adjust intensity with sliders in Laser tab.
Be safe: do not put a highly reflective object (metal, glass, shiny plastic) under the microscope objective. You cannot see the IR (infra red) light but it may be there! White paper is diffuse enough.
To see the IR light your cellphone camera may work.
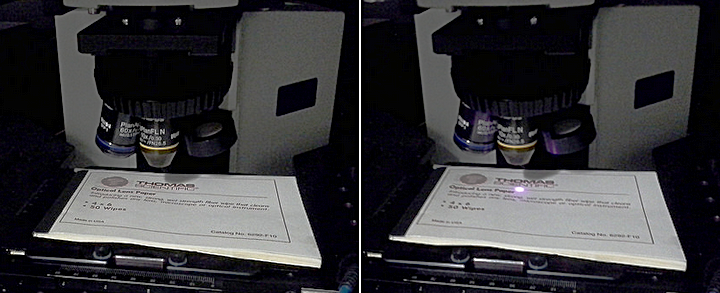
On the left, the laser shutters are closed. On the right they are open.
The official safe way to look for IR is with the IR viewer.
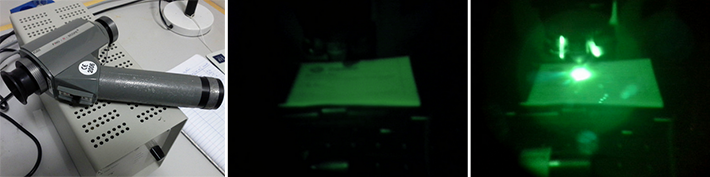
The left shows the IR viewer. Center, looking through the eyepiece of the IR viewer at the phosphor screen, the laser shutters are closed. On the right they are open.
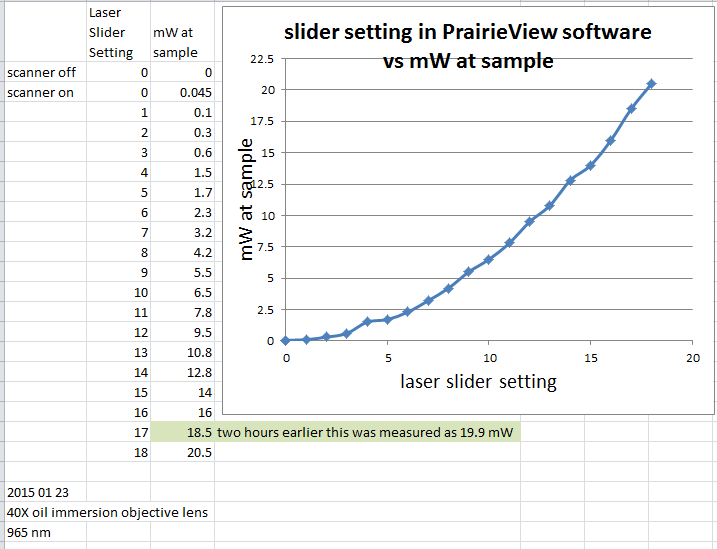
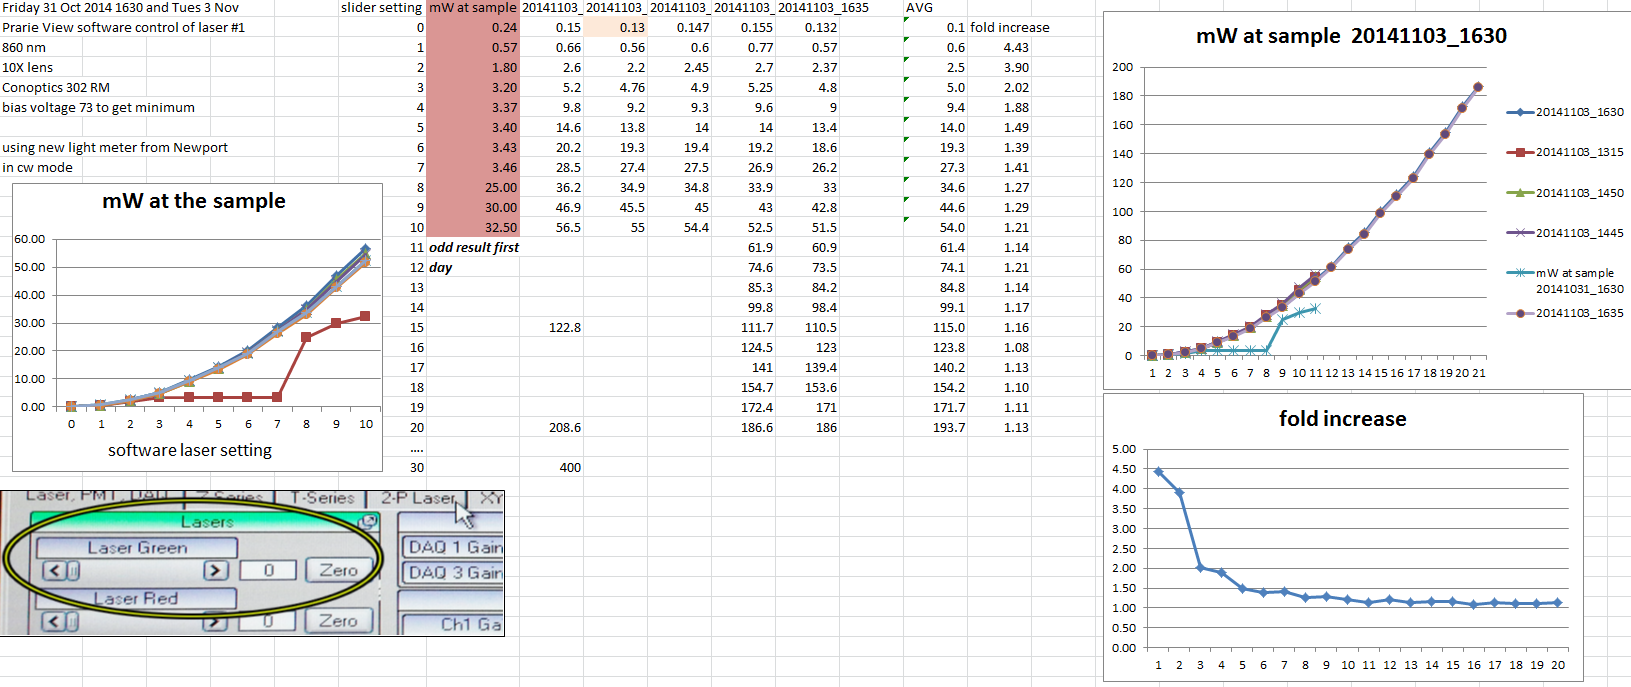
When the laser and Pockels cells have stabilized, the response should be something like this: [Excel] [PNG]. These readings were taken in Jan 2015 after the laser was attenuated at the source. Before the laser was attenuated, these readings from early Nov 2014 [Excel] [PNG] show the laser power in jumps too gross for protecting biology. The laser may be attenuated more if you need it.
Instructions are a work in progress. For most recent version:
Quickstart Guide
GaAr detector
turn on box & wait for LED to blink fast, then turn on to on
Software PrairieView
Switches #1, #2, and #3. |
Shutdown:
|
chiller water change every 3 mo
AOD and galvos mode; galvos more robust
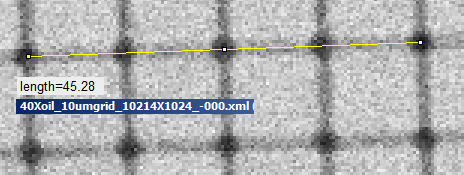
There is a tab in the software to set the microscope objective. When the lens is set for 40X and you are using the 40X oil lens, the scale is a little off in the .cfg file saved with the image. This example is a 1024 X 1024 transmitted light detector recording of a 10 um x 10 um grid from Thorlabs.
Opening files in ImageJ by opening the whole folder or opening the .cfg file will use this spatial scale that is very close to correct (and we should update to be correct). OPening the image file itself has a completely wrong scale.
Manual uncaging / photo activation using widefield illumination.
comments, questions, suggestions for this web page: Michael.Cammer@med.nyu.edu or mcammer@gmail.com