What and why Köhler illumination
Köhler illumination is uniform alignment of the incident or illuminating
light for microscopy.
Any time you use a transmission light technique, the single most important adjustment is having this alignment correct.
Every time you use the microscope for transmitted light work, whether
brightfield, phase or DIC, you must align the condenser lens to assure Koehler
illumination is optimal. If you fail to do this, you will have poor
resolution, wacky contrast artifacts, and unevenly lit
pictures.
When you put your first sample on the microscope, you need to focus on the cells and then align for Köhler illumination.
The first 6 minutes of this video shows it step-by-step: https://www.youtube.com/watch?v=P1Tb_sllWII
For more information, please also see the first 17 minutes of https://www.youtube.com/watch?v=H5-CfX3XLf0
Zeiss step-by-step video. https://www.youtube.com/watch?v=Qk8dbT-N1xw Cued to where you put the sample on the microscope. If you start earlier, DO NOT touch the lamp housing on any of our scopes as described earlier in the video. You may also ignore the last step of removing the eyepiece to adjust the iris diaphragm. For practical use, it may be set at the numerical aperture of the lens or open fully.
First part of this video is accessible and simple. https://www.youtube.com/watch?v=5MfZweoJ6A8 The part at the end about phase contrast is not how we set it up on our scopes.
Two more highly recommended videos by Jennifer Waters and Ron Vale. Waters' video https://www.youtube.com/watch?v=ZRZ9_ov6Fak goes deep into how Köhler illumination works. Vale's video https://www.youtube.com/watch?v=P1Tb_sllWII is more of a step-by-step on a Nikon microscope.
Brief Instructions
for Köhler illumination
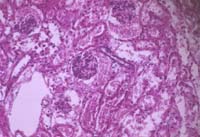
STEP 1
Focus your sample in
brightfield.
(Note the dark shadow in the upper
right)
|
 |
STEP 1a
Fully open the iris diaphragm. This is the aperture inside the condenser.
|
|
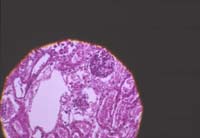
STEP 2
Close the field
diaphragm so it looks something like this.
The lower power the objective lens, the smaller the spot in the center.
|
 |
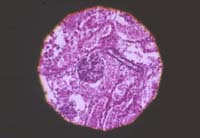
STEP 3
Focus the edge
of the diaphragm by adjusting the condenser height, so it looks like
this:
(if the image moves out of your
field of view, skip to step 4, then come back to step 3) |
 |
STEP 4
center the image using the two
centering screws, so it looks like this:
(Note centered, crisp edge) |
 |
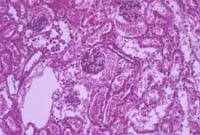
STEP 5
Open the field diaphragm until it is
at the edge of the field of view.
(Note that
the shadow in step 1 is gone.) |
 |
STEP 6
To increase contrast, slowly close the iris diaphram (the aperture inside the condenser) just until the image begins to get dark, then open it a smidge. It should be right on the edge of where it starts to decrease the instensity of the image.
Be careful when adjusting the condenser diaphragm. Closing the
condenser diaphram reduces resolution. To maximize both contrast and
resolution, close the diaphragm just to the point where the image begins to get
dark and no further. This position is especially important when using
Nomarski optics.
Alternatively, 1.) leave it open or 2.) set it to match the numerical aperture of the objective lens. |
|

last revised July 2020 by mc; previous authoring by cbm
in 2000