Hand tracing is far superior to thresholding.
INTRODUCTION

The graph on the left is from cells traced by hand very precisely in the
phase contrast picture and then iterative annuli processed in the fluorescent
channels. The two graphs are from the same population of cells stained for
cofilin after 1 min EGF stimulation.
The graph on the right had the cells traced automatically based on their
threshold.
The graph on the right is inferior because:
- Slight differences in threshold prevent the peaks from being properly
oriented at the correct distance from the leading edge.
- Less detailed tracing results in underreporting the proper concentration.
INSTRUCTIONS
Do all your tracings on the Phase Contrast images. This provides for
the most accurate edge of the cell.
I do all the tracings before any of the analysis and save them.
This means that I have the tracings saved and can use them multiple times for
different types of analysis.
The results are consistent and reproducible.
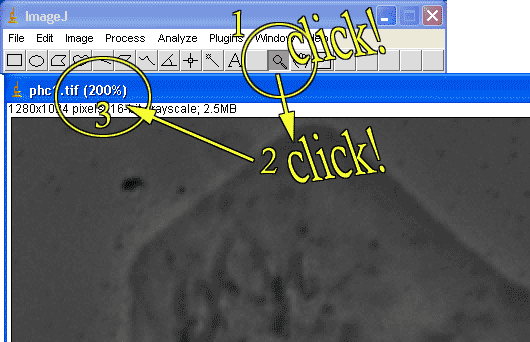
- Open the transmitted light image and zoom it to a size so that you can see
all the detail.
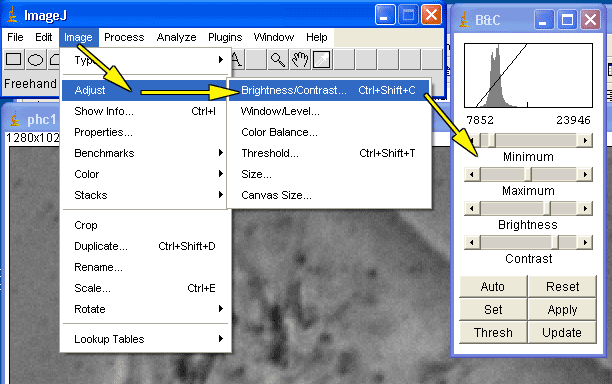
- Adjust the contrast if you want to see the edge of the cell better.
- Carefully trace along the edge of cell and cut out sections as you
go. There is no need to do the entire tracing with one line.
For instance, trace a segment and then type "<Ctrl>x".
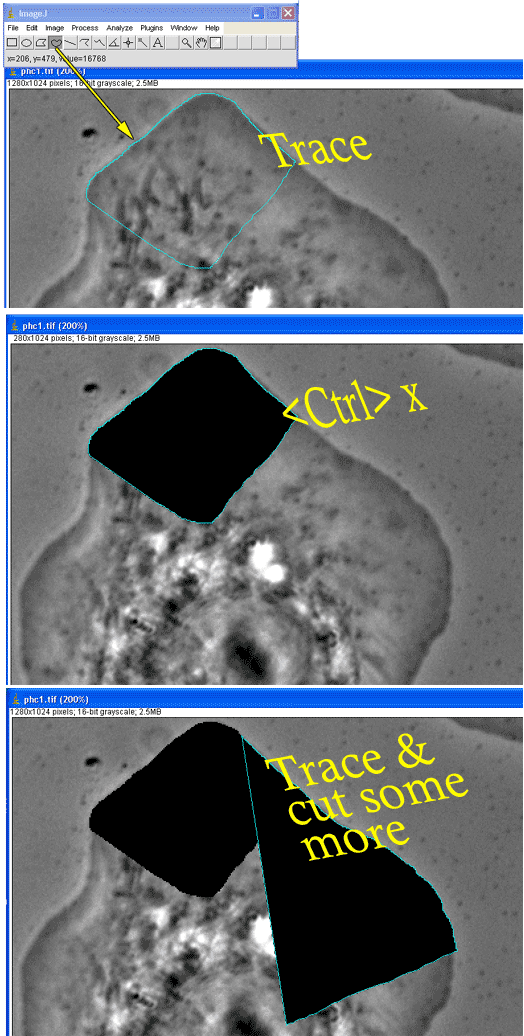
- Repeat the tracing and cutting until the entire cell is traced. Be
careful to consistently adhere to the edge of the cell when tracing.
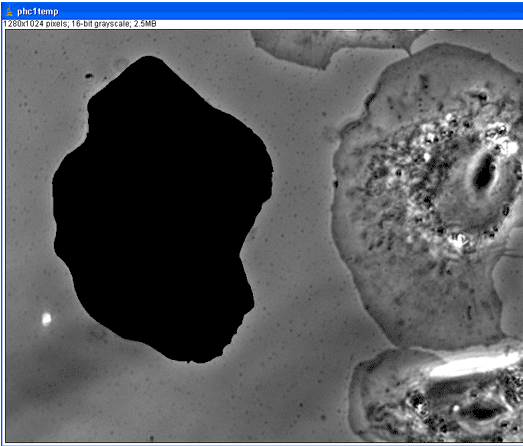
- Save the file. You will need it later. I trace all the
cells and save them before beginning any analysis.
Now it is time to do the analysis.
- Open the fluorescent images.
- Open the traced image.
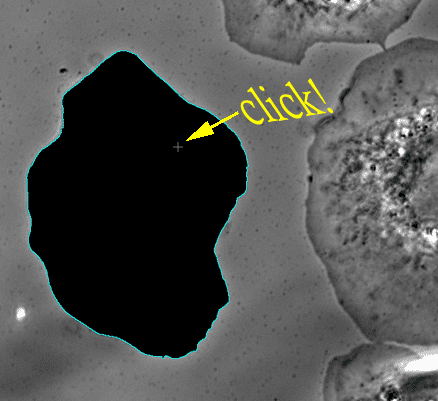
- Click on the magic wand tool.
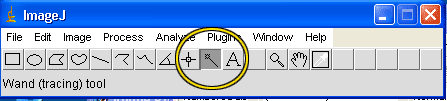
- Now click in the traced area. This will automatically and accurately
select it.
- Switch to the fluorescent labeled image.
- Type "<Ctrl>><Shift>e". This will
move the selection to the exact same place on the fluorescent image.

- Run the analysis macro or plugin, such as the annuli
or colocalization methods.