Zeiss AxioZoom microscope
Skirball 4th floor
Protocol for 96 Well Plate Imaging
- Remove existing plate if necessary by putting hex key or wood dowel into notch in upper right to use as release lever.

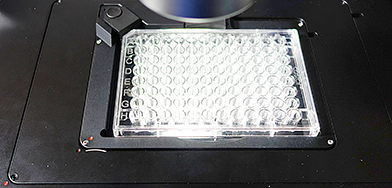
- Put stage plates and 96 well chamber in.
Stage plates are supposed to be kept in top drawer next to microscope.
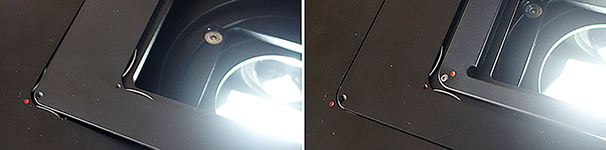
- There are clips at the lower left corner with the red dot.
Angle to corner of each plate to be inserted to press in the springs.
- Set up the camera exposure times for each channel you want to image.
[Not sure here whether to unlick channels for previewing below]
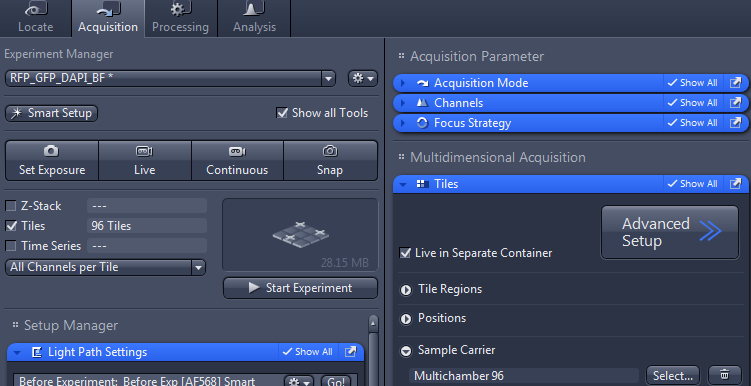
- Acquisition tab.
Click Tiles.
- In Tiles window choose Sample Carrier > “Multichamber96”.
- Advanced Setup button.
- 1/6 Make sure you see something.
- Next (bottom left of screen or lower right of active menu window)
- 2/6 Calibrate stage. This may be skipped.
- Next
- 3/6 Pull down menu choose “Search Chamber Center Points (3 points)” and have Rotation Compensation and Adapt Distance checked.
- Next
- 4/6 Click on Move Stage button should get you close to well A1.
- Fine tune location to precise center.
- Click on blue dot in square in upper left. It will gray out with a check mark. [Click here for screen snaps.]
- Next
- 5/6 Click on Move Stage button should get you close to well A12.
- Fine tune location to precise center.
- Click on blue dot in square in upper left. It will gray out with a check mark.
- Next
- 6/6 Click on Move Stage button should get you close to well H12.
- Fine tune location to precise center.
- Click on blue dot in square in upper left. It will gray out with a check mark.
- Finish button in bottom left of screen.
- Now you have to choose the wells you want pictures of.
If you want the whole plate, drag over the entire grid in the lower carrier tab (as pictured below).
You may only choose a few wells. Hold down the Ctrl key to add or subtract individual wells. Wells do not have to be in neat rectangular arrangements.
Chosen wells have bold blue outline.
- Click Create button. The chosen wells will turn yellow.
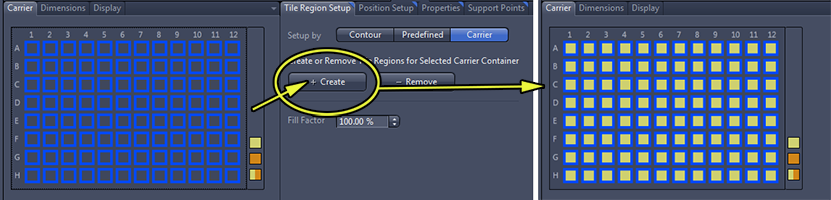
- You may continue to add or subtract wells. Make sure to click Create button to finalize the selection.
- Make sure all channels you want to image are checked.
- Start Experiment.
ImageJ macros for tiling etc here.
first posted 20150223_1353; last updated 20150528_1140
Michael.Cammer@med.nyu.edu or mcammer@gmail.com